This page shows two overall ways to allow a stencil to align on a curved glass. The first shows a video from a manufacturer on how to apply their photoresist stencils to a multi-curved glass surface. The second way is to find the radius which I show you step by step how to do and enter the measurement into software.
Simple Way to Create Curved Stencil
Although the video shows the application of a photoresist, you can easily use the suggestions to learn how to place any type of stencil to curved glass or stone surfaces. Watch the video below:
Alternative Way to Create Stencil Arc
Another way to apply the stencil mask on a round glass cup or mug is to find the radius of the arc/curve.
1. Take a strip of paper, wrap it around and tape it to the glass. You can also mark the edges of where you would like to etch the stencil.
2. Then measure down from the top lip of the glass to a level where you would like to place the text. In steps, continue to move a ruler around the glass and measure down with the same distance and mark a small line at the edge of that measurement.
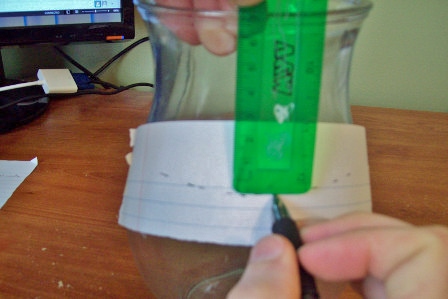
3. Once complete, it pull the paper off and you will be able to see the arc needed for the stencil as shown below.
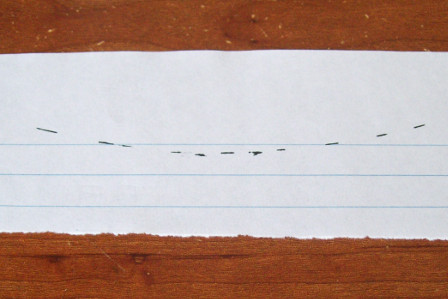
4. Tape the strip of paper with the arc onto a larger sheet of paper.
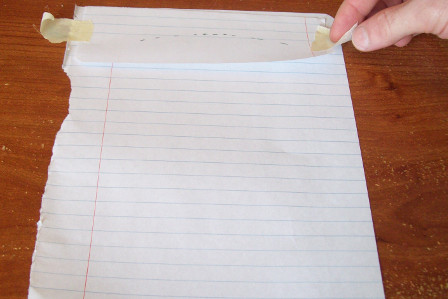
5. There are two ways to measure the radius which is needed to enter into your software for making a arc for your stencil to match. You can find the intersecting lines or use a compass drawing tool.
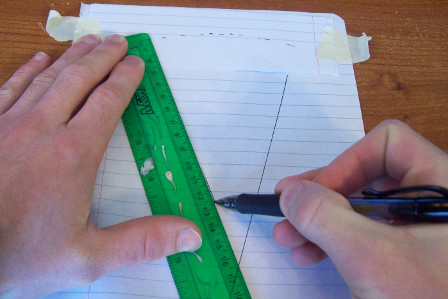
Option 1: Intersecting Lines
This is probably a less accurate way, but it can be used as a prerequisite for getting the compass in the “ballpark” range for option 2.
At each sides of the arc’s lines, place the ruler edge perpendicular to it and as closely as possible. Then draw a line down on both sides until it intersects. Once you find the intersection, measure from it to the arc line. That will be your radius needed to enter into the software.
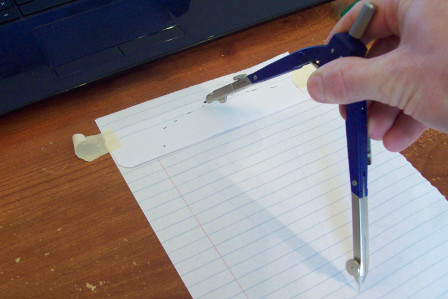
Option 2: Use a Compass Drawing Tool
For this option, open the compass up and move the needlepoint around until you can draw over the arc line. Then measure from the needlepoint to the arc line to get the radius.
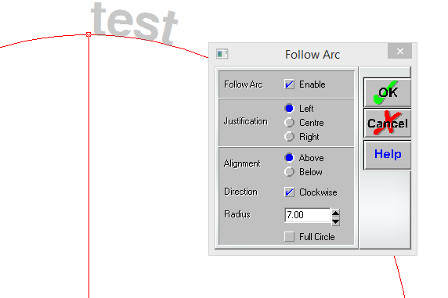
6. Enter Radius in Software. Again, once you find this radius measurement, you can enter it in the software to create an arc for text or patterns as I have done below. My radius was about 7 inches, so I entered 7 in for the radius and ensured my measurement scale in the software was in inches. I used the free SignBlazer vinyl cutting software I discussed here. This is done after the text is typed and by selecting “Text” from the toolbar and clicking “Text Follow an Arc.”
5 replies on “How to Apply a Stencil to Curved Glass Surfaces”
This was so helpful! I just ran into this problem this weekend as I am repurposing wine bottles by making them into decorative pieces. They have a slant to them and I wanted to sandblast a phrase onto one side. I could not figure out how to apply the resist and keep the words straight. Thank you for posting this. (I love Rayzist, btw)
How do you go about wine and champagne glasses.
Wine and champagne glasses can be a real pain. I always have trouble with them because the curves are both vertically and horizontally. I wrote about one tip here: https://www.glassetchingsecrets.com/blog/overcoming-problems-with-stencils/
Another tip you can try in addition is to lightly melt the stencil with a hot paint gun.
Eric,
I use a jig. First apply a scrap of vinyl around the object to etch, turn the object upside down then rotate it while using my jig to mark a line around the object. Scan the resulting line into your computer then using your software adjust your text or graphic to the line.
Jig: adjustable for holding a pencil 90 degrees to project.
There is a formula for this but it never worked for me! Also I adjust the text based on the bottom vs top! ((Upper vs Lower case)
Steve, I really like that idea. I might try it sometime. Thanks!