This content is restricted.
Category: Module 2
Vector Conversion Information & Tutorial
This content is restricted.
Inkscape Conversion Setting Tips
This content is restricted.
PhotoResist Tutorial
This content is restricted.
This page shows two overall ways to allow a stencil to align on a curved glass. The first shows a video from a manufacturer on how to apply their photoresist stencils to a multi-curved glass surface. The second way is to find the radius which I show you step by step how to do and enter the measurement into software.
Simple Way to Create Curved Stencil
Although the video shows the application of a photoresist, you can easily use the suggestions to learn how to place any type of stencil to curved glass or stone surfaces. Watch the video below:
Alternative Way to Create Stencil Arc
Another way to apply the stencil mask on a round glass cup or mug is to find the radius of the arc/curve.
1. Take a strip of paper, wrap it around and tape it to the glass. You can also mark the edges of where you would like to etch the stencil.
2. Then measure down from the top lip of the glass to a level where you would like to place the text. In steps, continue to move a ruler around the glass and measure down with the same distance and mark a small line at the edge of that measurement.
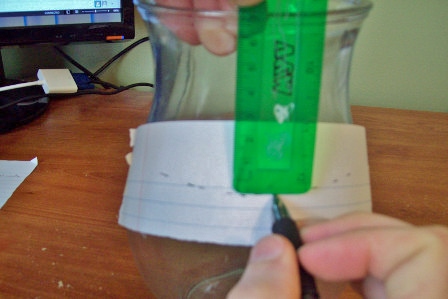
3. Once complete, it pull the paper off and you will be able to see the arc needed for the stencil as shown below.
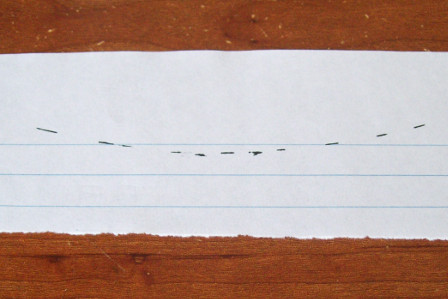
4. Tape the strip of paper with the arc onto a larger sheet of paper.
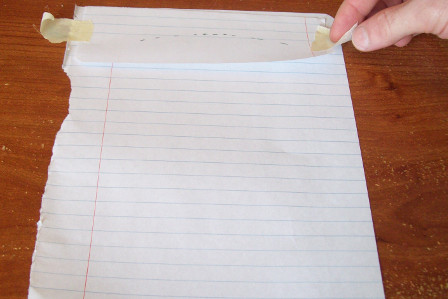
5. There are two ways to measure the radius which is needed to enter into your software for making a arc for your stencil to match. You can find the intersecting lines or use a compass drawing tool.
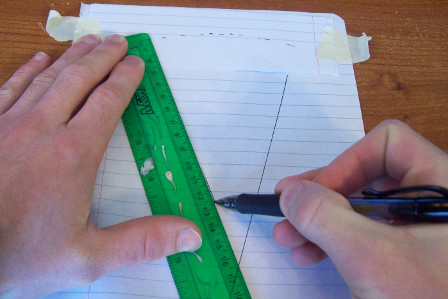
Option 1: Intersecting Lines
This is probably a less accurate way, but it can be used as a prerequisite for getting the compass in the “ballpark” range for option 2.
At each sides of the arc’s lines, place the ruler edge perpendicular to it and as closely as possible. Then draw a line down on both sides until it intersects. Once you find the intersection, measure from it to the arc line. That will be your radius needed to enter into the software.
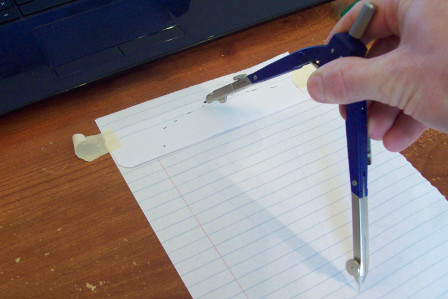
Option 2: Use a Compass Drawing Tool
For this option, open the compass up and move the needlepoint around until you can draw over the arc line. Then measure from the needlepoint to the arc line to get the radius.
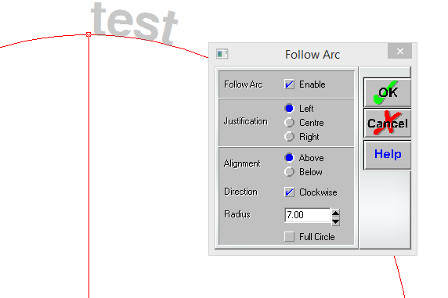
6. Enter Radius in Software. Again, once you find this radius measurement, you can enter it in the software to create an arc for text or patterns as I have done below. My radius was about 7 inches, so I entered 7 in for the radius and ensured my measurement scale in the software was in inches. I used the free SignBlazer vinyl cutting software I discussed here. This is done after the text is typed and by selecting “Text” from the toolbar and clicking “Text Follow an Arc.”
This content is restricted.
Connecting Wash Out Photo Resist Nozzle
As the video stated, I was going to show you how to connect your photo resist washout nozzle to a faucet in your house. One of the main reasons you want to hook these up to your faucet inside your house is because they are connected to the hot water line. And warm or hot water is usually ideal to use when washing out a photoressit. It helps washout the pattern in a timely manner.
Most of you are probably going to wash these out in your basement laundry room sink. And most basement sinks have the correct threads for the washout nozzle. In that case, you have no problem, but if you have one that your washout nozzle doesn’t fit onto, you will have to buy a adapter.
Manufacturers of photoresist washout nozzles don’t usually tell you how to connect them to home faucets so I figured this would help for those that don’t have the right threads.
1. Buy a adapter. You can find these at your local hardware store or check out this one I found on Amazon: http://amzn.to/A0Pd3X
I first bought a univeral faucet adapter shown on the left. This univeral adapter basically has a hose which clamps down on the faucet tip but it keep coming off so I don’t recommend getting this one. Get one show on the right which has a double sided thread.
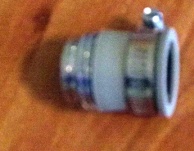
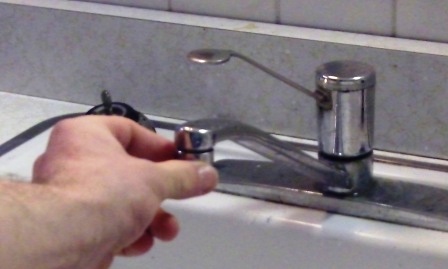
2. Remove faucet Tip– Remove the faucet tip by turning counter-clockwise. It may be too hard to loosen by hand so use pliers for assistance.
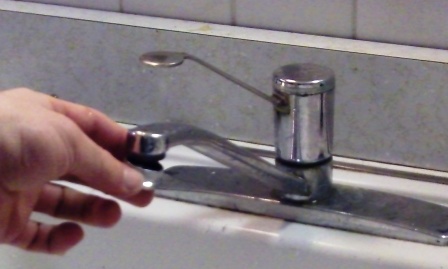
3. Tighten Adapter to Faucet– Turn the adapter clock-wise onto the faucet with the right threads.
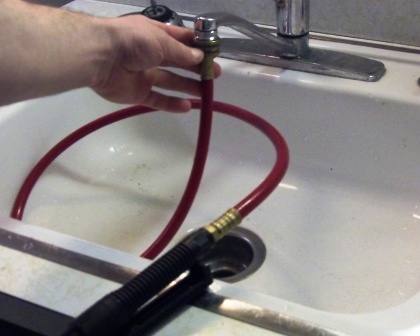
4. Screw Washout Nozzle on– And that’s it. You’re ready to make some great photoresist stencils.
Vinyl Cutter Tutorial
From start to finish
For this video, I wanted to walk you through the whole process that I use to create a stencil from my vinyl cutter. The software I use isn’t the most professional, but it should be satisfactory for a majority of the people here. And the combination of the software and equipment I use saves thousands of dollars. On top of that, it takes only a few minutes to create a professional looking stencil from the comfort of your computer.
This is the information I focused to help save you money, but if you are looking for a “high priced” cutter package, then I will list some resources below the video for you.
Also, some of you may decide to choose a different vinyl cutter or software so the process might be slightly different for you. But you will get the basic idea of the steps it takes to cut out a stencil with a vinyl cutter.
In the previous video I briefly went over the steps needed to cut out a stencil with the vinyl cutter and this video I decided to explain it in sections and show you in detail:
1. Vector Conversion Section 1: Convert images to Vector Format with a vector software program, if not already. A vector file is required for the vinyl cutter software to work.
2. Cutter Software Section 2: Import vector graphic into your Sign Cutting Software. Adjust graphic to desired size and add any desired text.
3. Cutter Operation Section 3: Have the Cutter automatically cut the design out
4. Stencil Application Section 4: Remove cut areas that you want to etch. Place on glass with transfer tape.
Now I will show this process in action with the video below….
Note: When using the hinge method, typically you leave the backing paper on first, tape one side, and make sure it is aligned properly first, but this works fine for the small stencil.
Vinyl Cutter Stenciling Process
Vinyl Cutter Introduction Video
The above video shows a simple introduction video of the vinyl cutter, but I listed a additional video to show you my inexpensive process with free software & the use of a value cutter.
Picking Out A Vinyl Cutter
Sandcarving
Sandcarving requires higher pressures than surface type etchings, so you will typically need a thicker stencil resists. When picking out a vinyl cutter for sandcarving, you need to make sure that the cutting force is strong enough for the thickness of resist. I encourage you to check with the manufacturer.
Cutting Blades for Sandcarving Resists
Thicker resists need a steeper angle (or pointer) on the cutting blade such as 60 degrees, while thinner resists can use a 45 degree blade. I talked about this more to help explain picking a vinyl cutter blade here.
Value Cutters vs. Professional Cutter for Sandcarving Resists
A lot of value cutters like the Creation brand that I suggest and own can cut thicker sandcarving resists but it really isn’t recommended for long term use. I sometimes cut out stencils from a 35 mil thick sandcarving resist with my Creation value cutter.
But most value cutters use a stepper motor, while professional ones use a servo motor which is more durable for cutting thicker sandblast stencil resists continuously. Typically the value cutters will work fine for glass etchers and occasionally cutting out thick sandmasks but it is ideal to use a professional grade cutter with a servo motor for a continuous sandmask cutting. This outside review is probably the most informative and helpful article on choosing a value cutter: blog.stahls.com/cheap-cutter-review/
Other Options: Value Cutters with Sandcarving Resists
These are some other options that I came up with to use a value cutter for creating sandcarving resists to help you save money which I don’t hear many people talking about. Please read my post on selecting a stencil resist which shows my other money saving options for sandcarving resists.
Cream Etching & Surface Sandblast Etching Resists
Just about all types of cutters will be able to cut a stencil thick enough for cream or surface sandblast etching, whether its a craft, value, or professional cutter. If this is all you’re doing, the cheaper value cutters and craft cutters will typically be more than suitable for you since most of these etching processes only require a thin 3 mil vinyl stencil.
Sources for Low Cost Vinyl Cutters
Value Cutter Brands
• Creation: https://www.glassetchingsecrets.com/creation
• Vinyl Express: https://www.glassetchingsecrets.com/vinyl-express
• Seiki: http://www.seikitech.com
• All USCutter products: https://www.glassetchingsecrets.com/uscutter
Professional Grade Cutter Brands/ Sources
• Roland: https://www.glassetchingsecrets.com/roland
• Graphtec: https://www.glassetchingsecrets.com/graphtec
• Summa: http://www.summausa.com
• Copam: https://www.glassetchingsecrets.com/copam