Categories
Module 2

Connecting Wash Out Photo Resist Nozzle

As the video stated, I was going to show you how to connect your photo resist washout nozzle to a faucet in your house. One of the main reasons you want to hook these up to your faucet inside your house is because they are connected to the hot water line. And warm or hot water is usually ideal to use when washing out a photoressit. It helps washout the pattern in a timely manner.

Most of you are probably going to wash these out in your basement laundry room sink. And most basement sinks have the correct threads for the washout nozzle. In that case, you have no problem, but if you have one that your washout nozzle doesn’t fit onto, you will have to buy a adapter.

Manufacturers of photoresist washout nozzles don’t usually tell you how to connect them to home faucets so I figured this would help for those that don’t have the right threads.

1. Buy a adapter. You can find these at your local hardware store or check out this one I found on Amazon: http://amzn.to/A0Pd3X

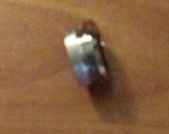
I first bought a univeral faucet adapter shown on the left. This univeral adapter basically has a hose which clamps down on the faucet tip but it keep coming off so I don’t recommend getting this one. Get one show on the right which has a double sided thread.
 

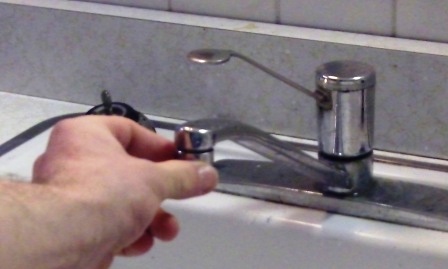
2. Remove faucet Tip– Remove the faucet tip by turning counter-clockwise. It may be too hard to loosen by hand so use pliers for assistance.
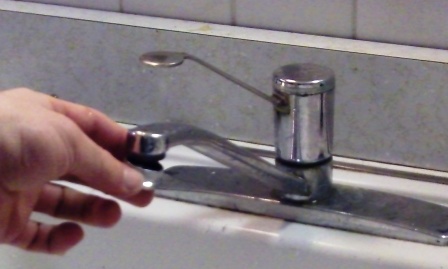
3. Tighten Adapter to Faucet– Turn the adapter clock-wise onto the faucet with the right threads.
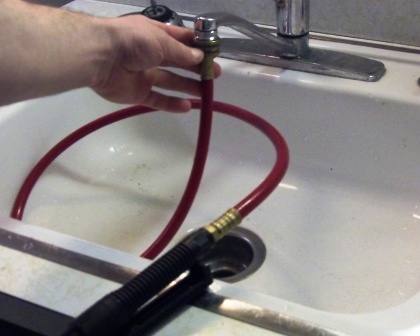
4. Screw Washout Nozzle on– And that’s it. You’re ready to make some great photoresist stencils.
Categories
Module 2

Vinyl Cutter Tutorial

From start to finish

For this video, I wanted to walk you through the whole process that I use to create a stencil from my vinyl cutter. The software I use isn’t the most professional, but it should be satisfactory for a majority of the people here. And the combination of the software and equipment I use saves thousands of dollars. On top of that, it takes only a few minutes to create a professional looking stencil from the comfort of your computer.

This is the information I focused to help save you money, but if you are looking for a “high priced” cutter package, then I will list some resources below the video for you.

Also, some of you may decide to choose a different vinyl cutter or software so the process might be slightly different for you. But you will get the basic idea of the steps it takes to cut out a stencil with a vinyl cutter.

In the previous video I briefly went over the steps needed to cut out a stencil with the vinyl cutter and this video I decided to explain it in sections and show you in detail:
1. Vector Conversion Section 1: Convert images to Vector Format with a vector software program, if not already. A vector file is required for the vinyl cutter software to work.
2. Cutter Software Section 2: Import vector graphic into your Sign Cutting Software. Adjust graphic to desired size and add any desired text.
3. Cutter Operation Section 3: Have the Cutter automatically cut the design out
4. Stencil Application Section 4: Remove cut areas that you want to etch. Place on glass with transfer tape.

Now I will show this process in action with the video below….

Note: When using the hinge method, typically you leave the backing paper on first, tape one side, and make sure it is aligned properly first, but this works fine for the small stencil.

Categories
Module 2

Vinyl Cutter Stenciling Process

Vinyl Cutter Introduction Video

The above video shows a simple introduction video of the vinyl cutter, but I listed a additional video to show you my inexpensive process with free software & the use of a value cutter.

Picking Out A Vinyl Cutter

Sandcarving

Sandcarving requires higher pressures than surface type etchings, so you will typically need a thicker stencil resists. When picking out a vinyl cutter for sandcarving, you need to make sure that the cutting force is strong enough for the thickness of resist. I encourage you to check with the manufacturer.

Cutting Blades for Sandcarving Resists

Thicker resists need a steeper angle (or pointer) on the cutting blade such as 60 degrees, while thinner resists can use a 45 degree blade. I talked about this more to help explain picking a vinyl cutter blade here.

Value Cutters vs. Professional Cutter for Sandcarving Resists

A lot of value cutters like the Creation brand that I suggest and own can cut thicker sandcarving resists but it really isn’t recommended for long term use. I sometimes cut out stencils from a 35 mil thick sandcarving resist with my Creation value cutter.

But most value cutters use a stepper motor, while professional ones use a servo motor which is more durable for cutting thicker sandblast stencil resists continuously. Typically the value cutters will work fine for glass etchers and occasionally cutting out thick sandmasks but it is ideal to use a professional grade cutter with a servo motor for a continuous sandmask cutting. This outside review is probably the most informative and helpful article on choosing a value cutter: blog.stahls.com/cheap-cutter-review/

Other Options: Value Cutters with Sandcarving Resists

These are some other options that I came up with to use a value cutter for creating sandcarving resists to help you save money which I don’t hear many people talking about. Please read my post on selecting a stencil resist which shows my other money saving options for sandcarving resists.

Cream Etching & Surface Sandblast Etching Resists

Just about all types of cutters will be able to cut a stencil thick enough for cream or surface sandblast etching, whether its a craft, value, or professional cutter. If this is all you’re doing, the cheaper value cutters and craft cutters will typically be more than suitable for you since most of these etching processes only require a thin 3 mil vinyl stencil.

Sources for Low Cost Vinyl Cutters

Value Cutter Brands
• Creation: https://www.glassetchingsecrets.com/creation
• Vinyl Express: https://www.glassetchingsecrets.com/vinyl-express
• Seiki: http://www.seikitech.com
• All USCutter products: https://www.glassetchingsecrets.com/uscutter

Professional Grade Cutter Brands/ Sources

• Roland: https://www.glassetchingsecrets.com/roland
• Graphtec: https://www.glassetchingsecrets.com/graphtec
• Summa: http://www.summausa.com
• Copam: https://www.glassetchingsecrets.com/copam

Categories
Module 2

RapidMask Detailed Instruction

Part 1

Part 2

Part 3

Categories
Module 2

Photo Resist Manufacturer Tutorials

Video from Ikonics Imaging (aka Photobrasive) discussing the process of using there great film.


You can see Ikonic Imaging’s detailed video instructions of their RapidMask photoresist process here.

Profitable Hobbies

Categories
Module 2

Print On Stencil Method

Other Outside Tutorial with Tips on Using Clear Coat

Print On Stencil Materials

These are some materials I looked for online that you can use which are more suitable for running through printers:

http://amzn.to/xGXFRI


http://amzn.to/wCvxVy


http://amzn.to/ycaXoS


http://amzn.to/yhFr5t


http://amzn.to/w4qPyw

(Not compatible with inkjet printers)http://amzn.to/zPitVI

Categories
Module 2

Stenciling Processes

Which Process Works Best for Me?

This is some what of a preference. I am a big fan of the vinyl cutter stencil process for what I do, but it depends on things specific that you desire.

The first two are good for those with no budget at all and occasionally etch glass for fun.

The second two are great for those that need precisely cut patterns and can automate most of the stencil production. I believe the vinyl cutter method is better for those that produce a lot of stencils with different patterns because the stencil material is much cheaper. While the Photo resist is much better for extremely fine pattern details and for producing a lot of multiple stencils with the same design.

  • Tracing Paper Method– Very simple and inexpensive. More hands on.
  • Print On Stencil Method– Fairly inexpensive & simple. Less hands on than tracing method.
  • Vinyl / Machine Cutter– Some what expensive for startup costs and more technical. Low on-going costs. Automatic cutting and less hands on. Great for large stencils and cuts fairly intricate patterns. Fairly good for producing bulk stencils.
  • Photoresist Method– Somewhat expensive for start up costs and ongoing costs. Great for very fine intricate patterns and needed for photo etchings. Good for producing bulk stencils.
Categories
Module 1

Photo Album

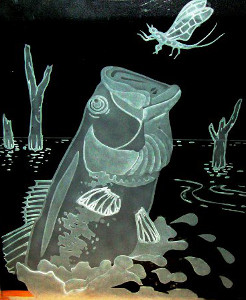
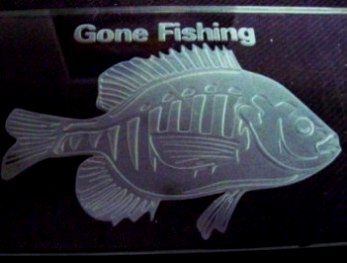
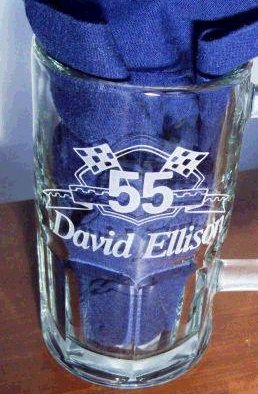
Etched Wine Bottlesandcarving double stage of a fish Etched beer mug with decorative flowers and fine lines.Etched beer mug with flower and name.

Another etched mug with flower. Etched bird in 2 stages.Sandcarving fish in 2 stages on flat glass.Personalized glass mug

Categories
Module 1

Cream Etching Tutorial

[nonmember][This content page is protected for members only. You may view what it will cover below:]

[If you’re currently registered for this level, then you have to sign in to view it. Thank you!]
Nonmembers, please sign up to the: Member Sign Up here
[/nonmember]

Summary:
Video explains all the types of items you can etch in addition to glass. Then shows the supplies list needed with other tips. And the last part shows a step by step video tutorial of how to etch a flat piece of glass correctly.

Categories
Module 1

Chemical Etching


Click this link for the glass etching cream tutorial.

(I decided to post it on another page.)

More info:


Etching with Hydrofluoric Acid PDF (microchemicals.eu)- Document provided on the web by Micro Chemicals which talks about the make up of Hydrofluoric Acid for etching glass, photoresist stability.

All About Acid Etched Glass PDF (walker-glass.com): Talks a little bit about the beauty and business of acid etched glass markets.

The video below talks about a product that contains a small percentage of HF. I tested it for etching glass, but the diluted solution barely etched the glass.

Ideas For Creating a Safer Hydrofluoric Acid Station (Video by: Jeri E.)
Hydrofluoric Acid (HF) can cause terrible burns, dissolve bones or even die from fluorides in your blood stream. Be sure to research HF handling and make containment chamber like this.

[nonmember][This content page is protected for members only. You may view what it will cover below:]

[If you’re currently registered for this level, then you have to sign in to view it. Thank you!]
Nonmembers, please sign up to the: Member Sign Up here

Summary:
This video explains the difference between the various chemical etching processes such as cream & hydrofluric acid etching. Goes in detail about safety and talks about the qulity of the etchings.[/nonmember]