
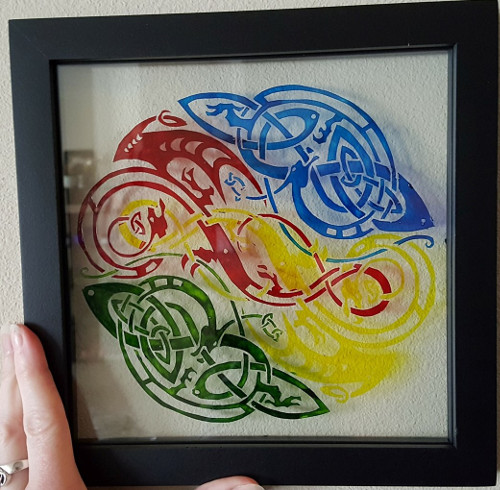
I am very happy to feature Evonne Buie today. She recently used our glass stain paints to create a faux stained glass design into the window of her house. She did an amazing job with the design and good use of color combinations- wow!
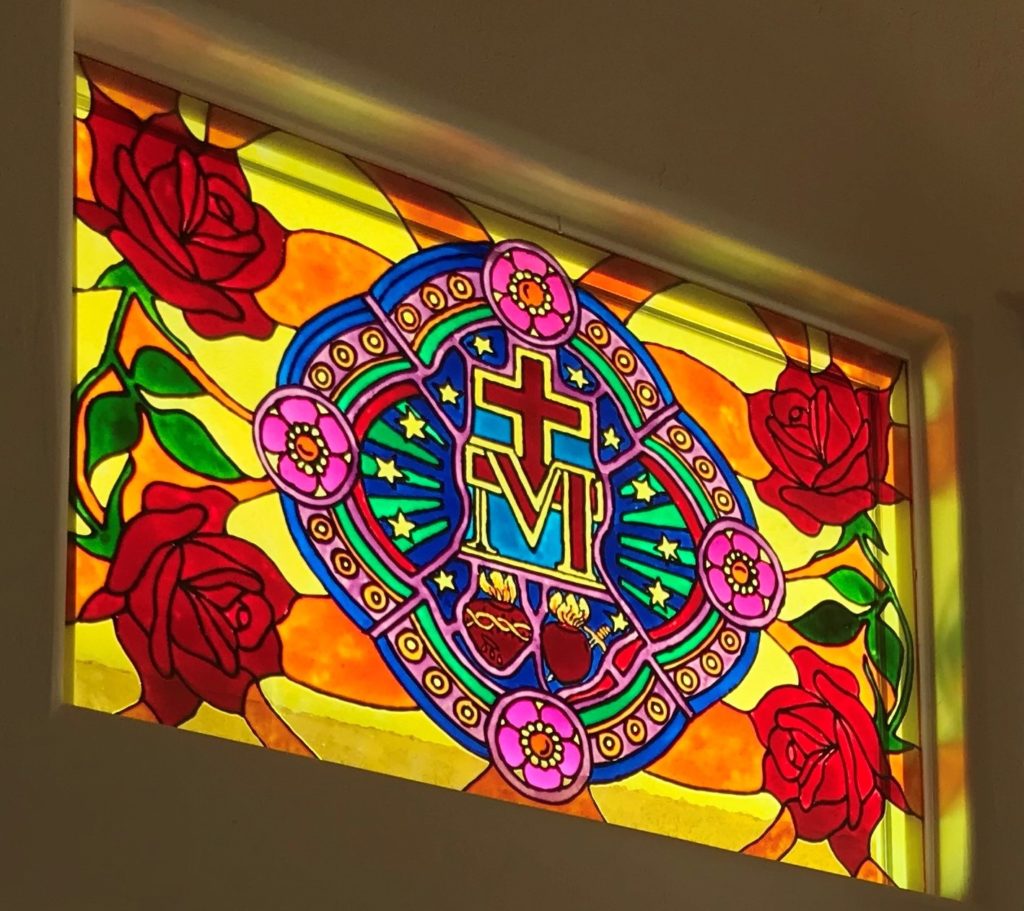
The design has an assortment of patterns, flower petals and roses.
Excellent Faux Leading Lines Too!
Just as impressive, the faux leading work she did also looks excellent. If you have worked on faux stained glass painting, you will realize the leading, such as this squeezable bottle, is tough to keep consistent lines and takes a lot of focus when using liquid lead products. I actually created a hot faux lead kit which uses a trigger to help control better, but it still takes some effort.
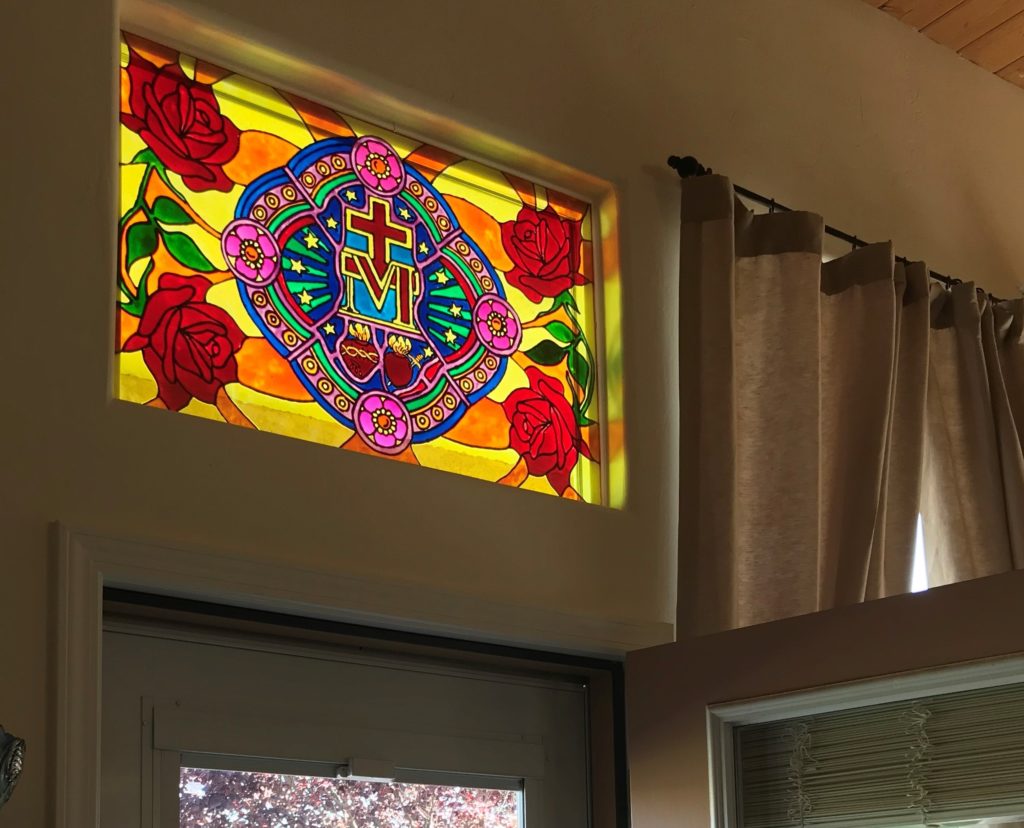
Faux Stained Glass Painted Directly on Window
I included another photo of what Evonne sent me which shows the project painted directly on the window. As you can see, it was completed on the window above her door.
How She Painted the Glass
Evonne shared the below info with us on how she did this project from start to finish.
I found the pattern on google images. I purchased the piece of glass at Home Depot and cut the glass to the measurement of my window. I placed the glass on my kitchen table because I knew the pattern would take a fair amount of time to draw and I wanted to be sitting and comfortable. I used a yard stick to draw grid lines on the glass. Then the drawing began. I used a thin black permanent marker sharpie and lacquer thinner on a q-tip as an eraser to fix my mistakes. I had to keep my iPad plugged in because I set it so it wouldn’t sleep. The image was locked and visible on my iPad for hours. Needless to say, the drawing of the pattern took the most time to complete. The roses are also images I googled. It’s actually one rose that I did a vertical flip on so I could copy mirror images on the glass. I then turned the glass and drew the two bottom roses as mirror images of each other (or at least as close to mirror images as I could get them). The leaves and stems for the roses were done free hand to connect the roses.
Once I finished drawing the pattern, I used the q-tip and lacquer thinner to remove the unwanted grid lines from the glass. I used liquid lead that I purchased from Hobby Lobby (doesn’t contain real lead) and piped lead over the permanent marker lines on my glass. Once the lead dried I began using a medical eye dropper to apply paint stain to the glass. This gave me the ability to suck up any bubbles in the paint. There were a few times that a drop of paint would bleed over. Using the q-tip and lacquer thinner was an easy way to clean up the stain mistakes as well. I really wanted the roses to stand out so I used yellow and orange instead of darker colors. I used the lacquer thinner to clean my glass dropper before switching colors.
I wrapped the edges of the glass in an adhesive copper tape to keep the glass from cutting me. I then cut a second piece of glass to size, wrapped it in copper adhesive tape and, after adding a dab of hot glue on each corner, I covered the painted side with the unpainted glass. I used more adhesive copper tape to seal all around and keep dust from settling between the two pieces of glass. This gives me the ability to clean it when needed without touching the painted side of the glass.
I used a ladder to gently place my “stained glass” in the window opening. And…done. Yay! My husband likes it so much that he wants me to make others to switch out for holidays throughout the year. He’s my biggest fan.
Excellent work, Evonne and thank you for being open to share your project. Everyone else, please leave her some comment love below. Thank you
Share this on social media or email by clicking below!
You must be really proud, your work is a xcellent
Wow simply awesome. Will try on NY home window. BREATHTAKING
Wow very beautiful work I am glad this was posted, it’s always nice to find another idea for glass, I am impressed well done
Beautifully done !!
Wow! Wow! Wow! So beautiful! I’d be there al day to just gaze upon it. Well done!
That is awesome! Great job!
Nicely done, and remember in nature most things (Roses) and not exactly the same.
very beautiful work
It’s such an amazing muster piece, BRAVO Evonne Buie
It’s such an amazing muster piece, well done Evonne Buie